15 Apr 2015
Installing the Graylog Server
Graylog is a free log management platform that can collect log data from a wide range of sources. This post shows how to quickly set up a Graylog server and start monitoring logs from Linux and Windows hosts. For detailed documentation refer to the Greylog Online Documentation.
The quickest way to get started is to download the Graylog OVA Appliance. This is imported into a new VM in your VMware environment.
Once the appliance is up and running, log in to the console with username and password ubuntu. We’re going to update the admin password, email config and timezone:
sudo graylog-ctl set-admin-password <password>
sudo graylog-ctl set-email-config <smtp server> --user=<username> --password=<password>
sudo graylog-ctl set-timezone <zone acronym>
sudo dpkg-reconfigure tzdata
We’ll also assign a static IP by editing /etc/network/interfaces, and then reload the network and Graylog service:
sudo ifdown eth0 && sudo ifup eth0
sudo graylog-ctl reconfigure
Finally, change the password for the ubuntu user on the VM with passwd and log off.
You can now access the server on the IP address we set above and log in with username admin and the password you set earlier. You may want to add a DNS record for the new server at this point.

Before we start sending log data to Graylog, we need to tell it what type of data we’ll be sending. We do this by creating two inputs: a Syslog UDP input for our Linux servers and a GELF UDP input for our Windows servers.
Click on System > Inputs, and select GELF UDP from the input menu. Click Launch new input. Turn on ‘Global input’, and give the input a name. All other settings can be left as their defaults. Repeat these steps to create another input, this time using the Syslog UDP type.
Set up Clients
Linux
On our linux clients we’ll configure rsyslog to forward log data to Graylog. Save the following config to /etc/rsyslog.d/90-graylog2.conf, replacing syslog.example.com with the IP address or DNS name of the Graylog server:
And restart rsyslog:
sudo service rsyslog restart
Windows
On our Windows clients we need to install NX Log Community Edition to export log data.
Once it’s installed, open up C:\Program Files (x86)\nxlog\conf\nxlog.conf and enter the following, replacing syslog.example.com with the IP address or DNS name of the Graylog server:
To apply the new config, reload the nxlog service.
Viewing Logs
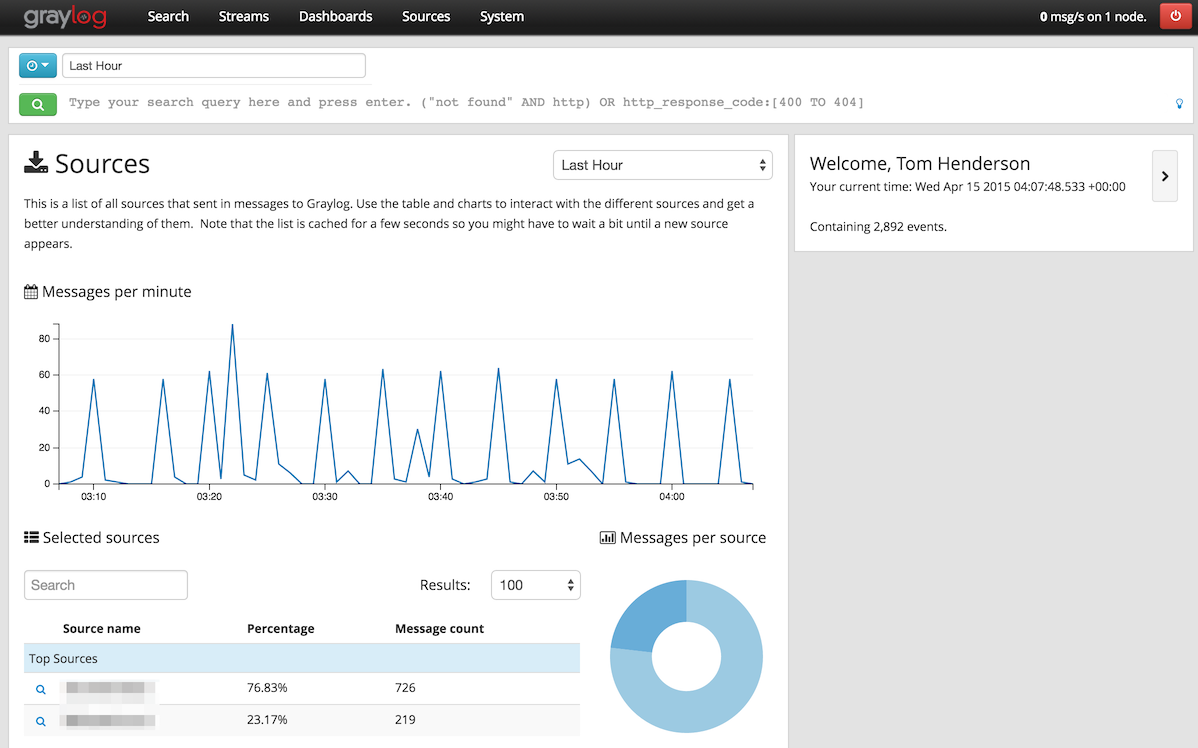
You should now be able to log in to your Graylog server and see log data coming in under the Sources tab.

08 Apr 2015
DokuWiki is a simple wiki that stores it’s data in plaintext files instead of a database. It’s an ideal tool for internal documentation, especially since it can be easily configured to authenticate against Active Directory, and use ACLs to control access to wiki sections.
As part of a backup review process I’ve been moving towards reducing the amount of data we back up unnecessarily. In particular there’s not much reason to back up entire servers when they can be rebuilt from scratch so easily. With that in mind it seemed like the simplest way to back up DokuWiki would be to use GitHub, with the added advantage of having versioned backups.
I added a new machine user to our GitHub account and set it up with ssh keys, created a new repository, and pushed the current state of the wiki to it. I then added a simple nightly cron job to commit and push any changes.
#!/bin/bash

cd /var/www
git commit -a -m "Wiki backup $(date +%F-%s)"
git push

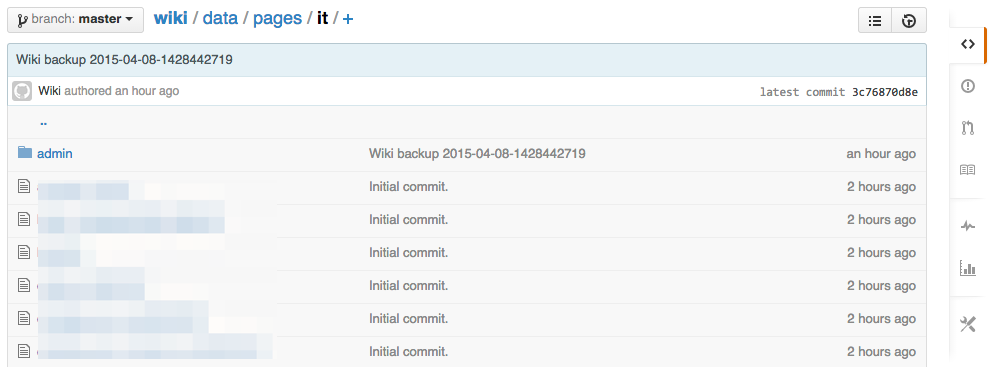
Git is smart about this, so if nothing has changed, nothing is pushed. Backup history can be easily viewed by looking at the commits history.
The best part about this is that since the data is just text, all our documentation is now available directly on GitHub. In the event of a major outage I can browse the wiki pages directly on GitHub.

15 Dec 2014
By setting up continuous deployment, any code committed to the master branch of your GitHub repository will be automatically checked out and tested by Codeship, and then deployed to your production servers. For our Django site it takes less than a minute after accepting a pull request for the new code to be live. The setup is fairly straightforward.
First I set up a new GitHub user account with read-only access to the project’s private repository. On the production server I created a new SSH key and added the public key to the new GitHub account. Since the script will be automated I used a blank passphrase.
I wrote a script to automate the deploy process on the server. This script is saved into the project repository, so it gets installed into the app directory on the production server (in my case /opt/my_app).
To allow the script to reload apache I added the following line to my /etc/sudoers file. This allows the last line of the script to run without prompting for a password.
django ALL=(ALL) NOPASSWD: /usr/sbin/service
On Codeship I set up a free account, linked it to the GitHub project, and set up the environment variables and test commands to build and test the project. Once this is set up every push (to any branch) will run these tests. This can be overridden by adding [skip ci] in the commit messages to help stay below the 100 builds limit.
In order to deploy the site (assuming the tests pass), Codeship needs SSH access to our server. First check /etc/ssh/sshd_config is set up to only allow public key authentication by setting:
PermitRootLogin no
PubkeyAuthentication yes
PasswordAuthentication no
Make sure your own public key saved in ~/.ssh/authorized_keys so you don’t lock yourself out. Add the codeship public key to the ~/.ssh/authorized_keys file for the user that will run the deployment script.
The final step is to set up a new custom deployment command on Codeship for the master branch. This will look something like this:
ssh django@my_site.com "/opt/my_app/deploy.sh"
19 Aug 2014
I’ve always been slightly proud of the fact that my OS X home folder has stayed with me for so long, across so many devices. It started life on our PowerMac G4, and has stayed with me through my 12” PowerBook, and my previous 13” PowerBook since 2010.
Apple’s Migration Assistant has come a long way since the first time I used it, and for users at work I don’t hesitate to use it to move their settings from machine to machine. When an account has been around as long as mine though it does pick up a fair amount of cruft, so I figured it was time to rebuild.
When my new 13” Retina MacBook arrived (3GHz i7, 16GB, 512GB) I decided to rebuild from scratch, installing only what I actually needed.
First Steps
After admiring the retina display for a while, I decided on the best way to get started:
- Dropbox
- 1Password
- Chrome
Installing Dropbox pulls down my 1Password database. Next I installed 1Password (from the App Store), followed by Chrome. Signing in to Chrome installs all my Chrome extensions and bookmarks, which means as far as browsers go I’m pretty much finished.
Copy Files
To make things easier I synced my SuperDuper backup drive, attached it to the new machine, and copied the files from there. I hadn’t noticed that the Sites folder was no longer included in the default home directory. See the fix below to get it working again.
- ~/Desktop
- ~/Documents
- ~/Downloads
- ~/Movies
- ~/Music
- ~/Pictures
- ~/Sites
Install Applications
Non App Store
In no particular order. I was surprised at how many of these just needed a log in to get back up and running.
App Store
It’s a shame the ‘Purchases’ tab doesn’t show free apps, and that there’s no way to hide apps you don’t want. Mine is filling up with apps I know I’ll never use again.
- Remote Desktop Client
- Radium
- Evernote
- Skitch
- NameMangler
- Caffeine
- Xcode
System Utilities
Dev Stuff
Git
Git isn’t actually installed by default, but if you run it you get an install prompt and OS X installs a bunch of dev stuff. I wish I’d paid a bit more attention here.
Dotfiles & System Settings
Worth rebooting after this.
cd ~
git clone https://github.com/tom-henderson/dotfiles.git
ln -s dotfiles/bash_profile .bash_profile
ln -s dotfiles/gitconfig .gitconfig
ln -s dotfiles/screenrc .screenrc
ln -s dotfiles/scripcs .scr
./dotfiles/keyboard-shortcuts.sh
./dotfiles/config-osx.sh
reboot
SSH
ssh-keygen -t rsa -C "${myemail}"
eval "$(ssh-agent -s)"
ssh-add ~/.ssh/id_rsa
Virtualenvwrapper
easy_install pip
pip install virtualenvwrapper
Jekyll:
Apache & Sites Folders
Not sure when this was removed from OSX, but it’s easy to turn back on.
SublimeText3 Packages
I really need to get my SublimeText configuration into git.
- Package Control
- Theme - Soda
- SideBarEnhancements
- GitGutter
- Djaneiro
- SublimeLinter
Migrate Settings
Messages History
Do this before opening Messages. Restores all the message history, attachments etc.
cp /Volumes/Backup/Users/tom/Library/Messages ~/Library/
cp /Volumes/Backup/Users/tom/Library/Containers/com.apple.iChat ~/Library/Containers/
Microsoft User Data
Why do they insist on dumping this in ~/Documents?
mv ~/Documents/Microsoft\ User\ Data ~/Library/Preferences
ColorSync Profiles
It took far to long to get my work monitor looking right. I’m not doing it again.
cp /Volumes/Backup/Users/tom/Library/ColorSync/profiles ~/Library/ColorSync/
Color Pickers, Swatches and Palettes
cp /Volumes/Backup/Users/tom/Library/ColorPickers ~/Library/
cp /Volumes/Backup/Users/tom/Library/Colors ~/Library/
Finishing Up
At this point I can get 99% of my work done without any issue. I’ll keep carrying around my backup drive from the old MacBook for now, but I should be able to recover any ~/Library files I need from BackBlaze if I do come across anything that’s worth migrating over.
As a last step I deleted the iWork/iLife apps I don’t use (Pages, Numbers, Keynote, iMovie and GarageBand), to free over 5.5GB of space. They may be great apps, but I’d rather just download them again if I need them.
19 Aug 2014
Not sure why this isn’t built in to OS X. Colour Picker is a nice easy way to launch the system colour picker from spotlight or the dock. It’s literally a 2 word AppleScript application:
I’d recommend using the icon from /Applications/Utilities/DigitalColor Meter.app.


